

Basement Systems Vancouver Before & After Photos
Click on a photo to enlarge.
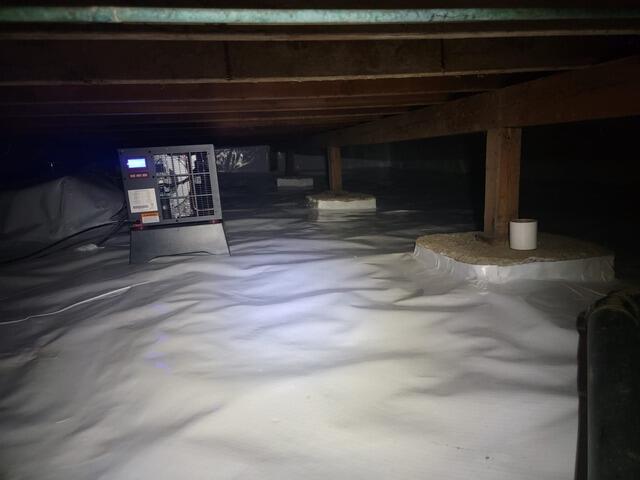
Crawl Space Moisture Control and Insulation Improvement in Chilliwack

This project was all about making the crawl space drier, healthier, and more comfortable. We installed a dehumidifier and air purification system to help control humidity and reduce damp conditions that can lead to mould and musty odors. The system drains safely into the existing plumbing and is supported on a stand for proper performance.
All wood surfaces were treated to help prevent mould growth, and the old fiberglass insulation along the exterior rim joist and wall framing was removed and disposed of. New wall insulation was installed and carefully sealed to reduce drafts and improve energy efficiency.
In the end, the crawl space is now cleaner, drier, and better insulated, helping protect the home and giving the homeowners greater comfort and peace of mind.
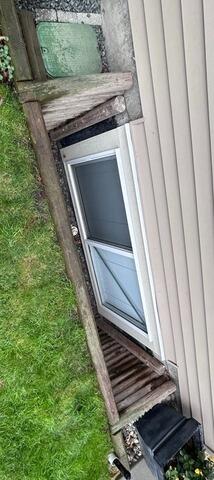
Multiple Window Well Replacement and Drainage Improvement in Chilliwack
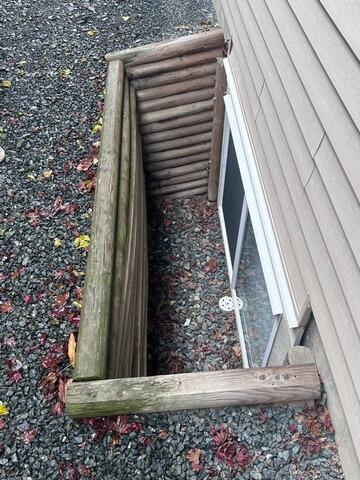
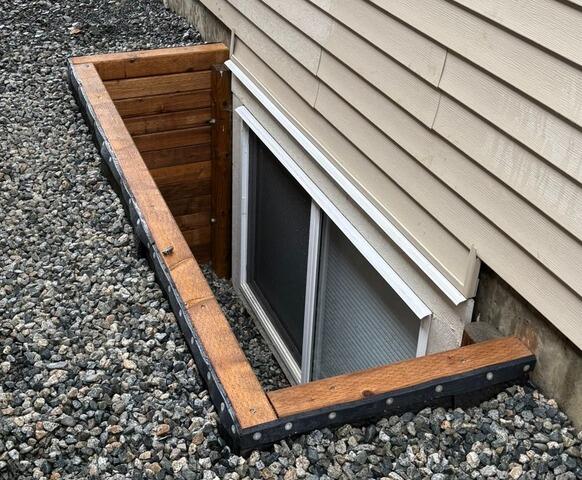
This project focused on replacing several window wells to improve drainage and better protect the home from water intrusion. All old materials were removed and properly disposed of, and excess soil and debris were cleared to create proper clearance below each window and bump-out area. Clean stone was added to help water flow away efficiently.
New window wells were built using treated lumber for durability and long-term performance. A drainage layer was installed along the exterior of each well to direct water away from the foundation, with a clean finish along the top edge. Each area was then backfilled with drain rock to support proper drainage.
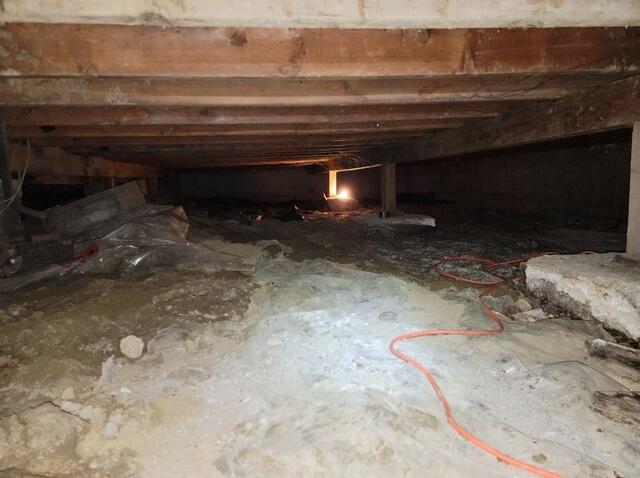
Crawl Space Encapsulation and Insulation Upgrade in Chilliwack

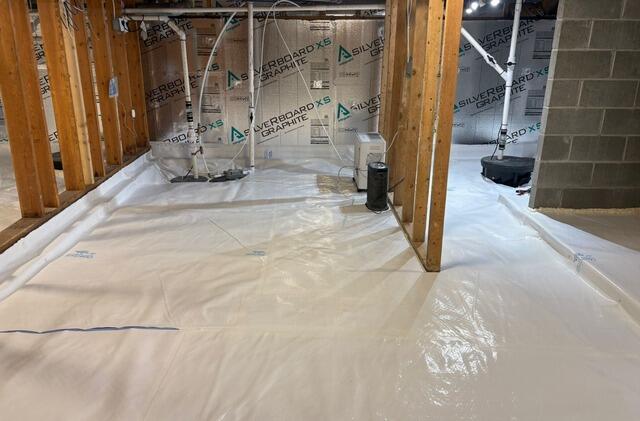
This project focused on sealing and insulating the crawl space to improve moisture control and overall comfort. A full liner system was installed across the crawl space and carefully sealed around footings, piers, and along the foundation walls. The liner was also extended underneath existing support walls to ensure full coverage and a continuous barrier against moisture and air.
A drainage layer was added beneath the liner and extended up the walls to help manage ground moisture and create a more durable surface.
To improve energy efficiency, insulation was installed along the foundation walls and in the rim joist areas. All seams and edges were carefully sealed to reduce drafts and prevent moisture issues.
These upgrades help keep the crawl space dry, clean, and well-insulated, supporting a healthier and more comfortable home.
Crawl Space Repair & Protection
For this project, we worked on making the crawl space dry, stable, and energy-efficient. We started by adding a protective barrier across the floor and up the walls to keep out ground moisture and create a clean surface for storage. To keep the air fresh and dry, we included a dehumidifier with its own stand and outlet.
For extra strength, new support posts and beams were installed to stabilize the structure above. We also wrapped the piers, sealed up the rim joists with insulation to improve energy savings, and finished the job by fully sealing the space to lock out moisture and outside air. Together, these steps give the crawl space long-term protection and create a healthier home environment.
Waterguard Before and After


Before and After of a Waterguard Installation in Chilliwack BC.
Our Service Area
We serve the following areas
- Abbotsford
- Agassiz
- Aldergrove
- Beaverdell
- Bridesville
- Burnaby
- Cawston
- Chilliwack
- Christina Lake
- Coquitlam
- Cultus Lake
- Delta
- Deroche
- Dewdney
- East Gate
- Grand Forks
- Greenwood
- Harrison Hot Springs
- Harrison Mills
- Hedley
- Hope
- Kaleden
- Kelowna
- Keremeos
- Lake Errock
- Langley
- Lindell Beach
- Maple Ridge
- Midway
- Mission
- Mount Baldy
- Naramata
- North Vancouver
- Okanagan Falls
- Oliver
- Osoyoos
- Peachland
- Penticton
- Port Moody
- Princeton
- Richmond
- Rock Creek
- Rosedale
- Summerland
- Surrey
- Tsawwassen
- Vancouver
- West Vancouver
- Westbridge
- White Rock


 or cash